Last updated November 17, 2026




Free written scope consultation - allowances, timeline, and change-order rules on paper before a single trade is scheduled
Driveway & Pavers Maintenance Schedule: What to Do and When
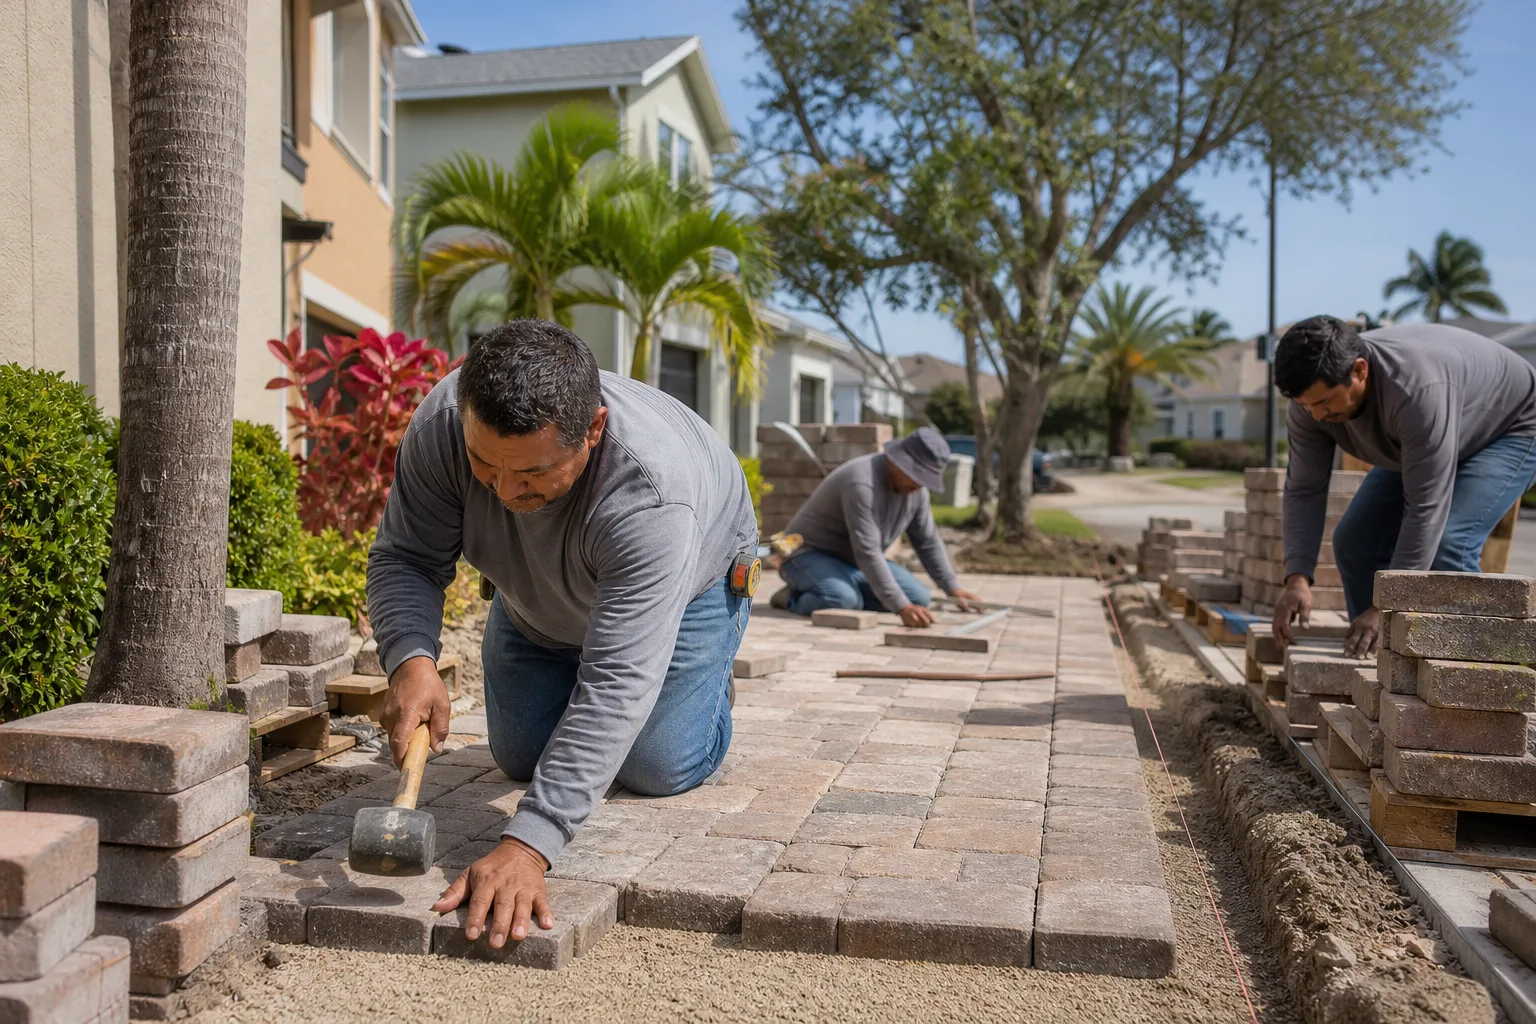
Most paver driveways in Newport Beach don’t fail because the pavers were cheap. They fail because the joints were ignored. Polymeric sand has a service life of roughly four to six years in coastal sun, and almost no installer mentions it at the handoff. Skip the resand cycle and you get three expensive problems at once: ant colonies tunneling under the sand, weeds threading through the joints, and pavers that start to rock because the bedding layer has nothing locking it together. The fix is a calendar, not a weekend of panic. This guide lays out the actual schedule – month by month, coast versus inland, spring versus fall – and shows you how to inspect the edge restraints before they fail visibly. Do it right and you’re looking at under three hours a year, and a driveway that outlasts one maintained on vague advice by fifteen to twenty years.
Quick Answer
Polymeric sand needs a full replacement every four to six years on the coast and six to eight years inland, with a top-off in between if it drops below the paver chamfer. Seal pavers every three to five years depending on type – concrete pavers on the Newport Beach coast lean toward the shorter end because of UV and marine-layer moisture cycling. Spring tasks are inspection, joint topping and weed control. Fall tasks are edge restraint checks and pre-winter sealing. That’s the whole schedule.
Styles & brands we work with
- Kitchen remodeling
- Bathroom remodeling
- Home additions & ADU
- Roofing
- Windows & doors
- Driveway & pavers
- Fence
Table of Contents
- The Full-Year Maintenance Calendar at a Glance
- When Polymeric Sand Needs Replacement vs. a Top-Off
- Re-Sealing Intervals by Paver Type and Exposure
- Spring Tasks for Newport Beach’s Climate
- Fall Tasks and the Marine Layer Problem
- How to Inspect Edge Restraints Annually
- After a Santa Ana Wind Event or Flooding
- What You Can Do Yourself vs. What Needs a Pro
The Full-Year Maintenance Calendar at a Glance
Here’s the honest time budget: roughly two and a half to three hours of actual work per year, spread across four or five visits. That’s it. The rest of maintaining a paver driveway in Newport Beach is looking, not doing – a ten-minute walk after each seasonal change that catches problems while they’re still cheap.
A hard calendar beats “maintain as needed” every time, because “as needed” means “never” for most households. Here’s how the year breaks down:
- Late February (30 min): Walk the perimeter. Look for weeds in the first and last row of joints, check for rocking pavers, and note any joint where the sand has dropped visibly below the paver surface.
- March – April (60-90 min): Top off joints with fresh polymeric sand where needed. Spot-treat weeds. Rinse the surface clean.
- June (30 min): Mid-year restraint inspection. Look along every driveway edge for gaps between the paver row and the concrete curb or border.
- August – September (0 min, just observe): Peak UV season. Watch for joint sand powdering or eroding after irrigation cycles.
- October – November (60-90 min): Full re-sand if the four-to-six-year clock is up. Seal if the three-to-five-year clock is up. Final edge restraint check before the rainy months.
- December – February (15 min): Post-storm walk. Look for displaced sand and ponding. Note, don’t act until spring unless a paver is actually rocking.
That’s the skeleton. The rest of this guide fills in the judgment calls – when “top-off” is enough and when it’s not, why coastal Newport Beach paver driveways need different intervals than ones up in the hills, and what actually breaks first after a Santa Ana wind event.
When Polymeric Sand Needs Replacement vs. a Top-Off
A top-off is right when the joint is still mostly full but has settled an eighth to a quarter inch below the paver chamfer. A full replacement is right when the joint is empty all the way down to the bedding layer, or when the remaining sand moves freely under a light broom. The confusion most homeowners hit is that both problems look similar from standing height. Get down on a knee and use your finger.
Here’s the visual test we use on-site:
- Top-off signs: Joints look slightly recessed but evenly filled. Sand is still firm when poked. Weeds are isolated to one or two spots. No visible void in the joint.
- Replacement signs: You can see daylight between pavers. Sand crumbles when you press it. The joint surface is 3/8″ or more below the paver edge. Ants have built visible mounds along a joint line. Moss (rare in Newport Beach, but it shows up in shaded north-facing driveways on Lido Isle) is growing between pavers, not just on them.
- Emergency replacement signs: Pavers are rocking when you walk on them. This is a stability problem, not a cosmetic one – the joint sand is gone and the bedding layer is compressing.
One detail installers rarely explain: polymeric sand doesn’t just fill the joint, it locks pavers horizontally. Once the sand degrades past a certain point, the pavers on the edges of your driveway – the ones that get driven over at an angle – start walking outward. That outward creep is what stresses the edge restraint. Pass that point and you’re not doing maintenance anymore, you’re doing repair. If you’re watching for the earliest possible warning sign, watch the outer border row. When it starts to shift, the sand underneath is already gone.
If you’re not sure which side of the line you’re on, have a professional look before you spend a Saturday. Our Driveway & Pavers in Newport Beach team can diagnose joint condition in a quick walkthrough and give you a written recommendation – top-off or replacement – with a fixed price either way.
Re-Sealing Intervals by Paver Type and Exposure
The generic advice is “seal every three to five years.” That’s a range wide enough to be useless. In Newport Beach, the right interval depends heavily on paver material and where the driveway sits relative to the ocean. Here’s what we actually recommend:
Concrete pavers (the most common in Newport Beach)
- Coastal exposure (Balboa, Lido Isle, Corona del Mar, Balboa Peninsula): Seal every three years. Marine layer moisture cycling plus salt air plus UV breaks down penetrating sealers faster here than anywhere else in the region.
- Inland exposure (Eastbluff, Bonita Canyon, Newport Coast): Seal every four to five years. Less moisture, more direct sun – UV still degrades the sealer, but the cycling stress is lower.
Clay and brick pavers
Clay and brick are more dimensionally stable than concrete pavers and hold polymeric sand joints more reliably. Seal every five to seven years, coastal or inland. Watch for efflorescence – that white powder haze that shows up after wet winters – which needs a specific efflorescence remover before any sealer goes down, never a general cleaner.
Natural stone (travertine, flagstone)
Stone needs a penetrating sealer, not a film-forming one, or it will look wet and cloudy in the marine air. Re-seal every two to three years if the stone is travertine near the coast, every three to four years otherwise. Natural cleft flagstone is more forgiving – four to five years is usually fine.
What doesn’t matter as much as people think
Brand of sealer matters less than application condition. Sealer applied to a damp paver surface, or above 85 degrees surface temperature, or within 24 hours of fresh polymeric sand, will fail early regardless of what the can says. A failed three-year sealer is worse than an honest four-year interval on a quality product.
Spring Tasks for Newport Beach’s Climate
Newport Beach doesn’t have freeze-thaw. What we have instead is a specific and underrated set of stressors: UV that stays strong year round, a marine layer that keeps paver surfaces damp from evening to mid-morning for months, and irrigation overspray that hits the same joint line every day. The spring to-do list is built around those, not around winter damage.
Here’s the sequence we run on client driveways each spring, in order:
- Full perimeter walk (15 min). Every edge of the driveway, both sides. Look for weeds in the first and last row of joints – this is where joint sand degrades first because it’s where the paver edges get the most stress.
- Rock test (5 min). Step on every paver along the borders and along the tire tracks. If any rock underfoot, mark it. A single rocking paver is a joint sand failure. Three or more in a row is a bedding layer problem that needs a professional look.
- Joint depth inspection (15 min). Get down on a knee and feel the joint surface. Below the chamfer by more than 1/8″? Top off. Below by more than 3/8″ in one area? Full replacement for that zone.
- Weed removal (15 min). Pull, don’t spray, in the joints. Glyphosate in a joint will degrade the polymeric sand over time and kill the neighbors’ landscaping along the driveway edge. Hand-pull with a weeding tool and then re-top the joint with fresh sand.
- Sand top-off (30-45 min) only if needed. Sweep into joints dry, mist to activate, allow to cure 24 hours before driving on it. This is the single most skipped step – the top-off is what prevents premature full resanding.
- Irrigation audit (10 min). Turn the system on and watch. If the sprinkler is hitting the driveway, redirect the head. Daily overspray on the same paver joint is the fastest way to destroy polymeric sand, and barely anyone checks it.
Spring in Newport Beach is also the right time to check drainage away from the driveway. Our grade sits on a slope everywhere, and a spring rain sometimes reveals a spot where water is running across the surface instead of off it. If you see sediment or sand piling up at a specific edge every spring, that edge needs a look at the underlying grade – not another top-off.
Fall Tasks and the Marine Layer Problem
Fall is the maintenance window that matters most for the long-term system. It’s the last chance to fix joints and restraints before the rainy months, and it’s the right time to seal because surface temperatures have dropped into the range where sealer actually cures properly.
The marine layer drives most of the fall work. Paver surfaces in Newport Beach stay damp from evening to mid-morning for most of the fall, and any sand or sealer that goes down too early in the day on a damp surface will fail. Two specific rules:
- Never apply polymeric sand or sealer before 10 a.m. in late fall in coastal Newport Beach. Damp surface = failed application. Wait until the top of the pavers is fully dry by touch.
- Never seal within 48 hours of a marine layer event that left visible dew on the surface. The sealer needs a genuinely dry paver to penetrate the way it should. In landlocked parts of the city – Eastbluff, Bonita Canyon – the marine layer is lighter and window timing is more forgiving.
The fall checklist:
- Full re-sand if the four-to-six-year clock has come up. Coastal driveways in Corona del Mar and Balboa are on the four-year end. Inland Newport Coast can stretch to six.
- Seal if the three-to-five-year clock has come up. Concrete pavers coastal: three years. Inland: four to five.
- Edge restraint inspection (covered in detail below).
- Drain check. Clear any debris from channel drains or driveway trench drains. A blocked drain in a Newport Beach driveway turns a two-inch rain into a puddle that sits against the garage threshold overnight.
- Irrigation shut-off or reduction. Dropping the schedule by half in fall reduces the daily overspray that damaged your joints all summer.
One thing we see constantly in the coastal neighborhoods: North-facing driveways on Lido Isle and Balboa collect marine layer moisture on their surface for hours longer than south-facing ones. Those driveways need sealer applied earlier in the day and need their joints checked in fall, not spring – the constant moisture stresses the sand first. It’s a small adjustment that makes a big difference over a decade.
How to Inspect Edge Restraints Annually
The edge restraint – the concrete curb, aluminum track, or PVC edge that holds your pavers from walking outward – is the single most skipped maintenance item on any paver driveway, in Newport Beach or anywhere else. Failure is invisible until it’s catastrophic. The pavers hold shape while the restraint underneath has already started to fail, then one day a section spreads a half-inch in a month.
Here’s how we inspect edge restraints, and how you can too:
- Walk the full perimeter slowly, looking down. Pay attention to where the paver field meets the concrete driveway apron, garage apron, curb, and any border course. That perimeter is where every restraint problem starts.
- Look for a gap between the paver edge and the concrete or aluminum edge. A visible gap – even 1/16″ – in one spot is a sign the restraint has moved or a spike has backed out.
- Press firmly on the outer paver row with your heel. If the row flexes outward rather than holding firmly, the restraint is losing grip.
- Check the visible fasteners. Aluminum edge restraints in Newport Beach use stakes or spikes. Look along the top edge for anything sticking up more than normal – that’s a spike backing out.
- Look at the adjacent soil or landscape edge. If soil has washed away from behind the restraint, the restraint has no lateral support and will fail faster.
- Note the location of every gap or flex and check again in 90 days. A gap that doesn’t grow is stable. A gap that grows is a repair waiting to happen.
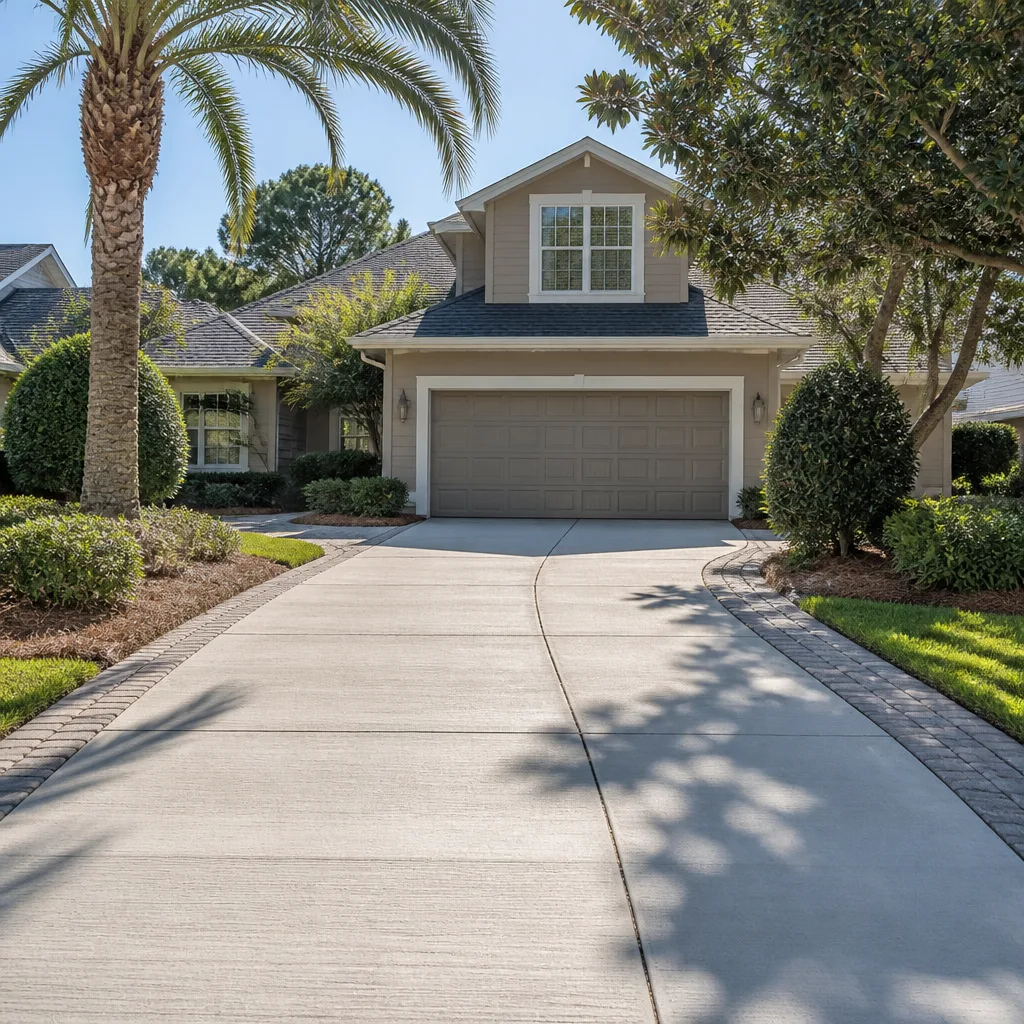
We typically find one failing section in about one in four driveways we inspect in Newport Beach. The repair for a single failing section is straightforward – reset the restraint, replace the spikes, re-sand the affected joints. Catch it early and it’s a small job. Catch it late and you’re replacing the outer two rows of pavers because they’ve all shifted and the joint pattern is broken.
The one thing you should not do yourself is re-spike an aluminum restraint along a driveway that abuts the street curb. Getting that edge within Newport Beach’s right-of-way rules is easier with a pro who knows where the property line falls and what the curb setback requires. If you’re inspecting and finding movement, our Fence Installation in Newport Beach team also handles paver edge restraints since both are perimeter hardscape work – and we do it under the same 730-Day Done Right Promise we use on every project.
After a Santa Ana Wind Event or Flooding: What Most Homeowners Miss
Santa Ana winds are the single biggest maintenance trigger in Newport Beach that nobody plans for. Wind doesn’t blow your driveway apart, but it does something equally expensive: it deposits fine grit into every open joint, and it strips loose sand out. The grit is the problem – it sits in the joint on top of weakened polymeric sand and, over the next two years, prevents new sand from bonding when you try to top off. A fall top-off applied without a proper blow-out and clean first will fail in a year.
Wind event checklist (do this within two weeks of the wind dying down):
- Blow out the joints with a leaf blower on low pressure – high pressure will strip the remaining sand. Just remove the deposited grit.
- Inspect the perimeter for displaced sand, mini dunes at the edge of the driveway, and small piles where the wind curled over a fence or wall.
- Check the drainage path for anything that blew into a channel drain or scupper – one palm frond in the wrong spot can turn a Santa Ana-driven rain into a ponded driveway overnight.
Flooding from an unexpected rain event is different. When water ponds on a paver driveway, it deposited silt and, more importantly, it may have undermined the sand under the joints along the low edge. Do three things in order:
- Let it dry fully before touching anything – three full days minimum after the surface is clear. Sand that looks fine on day one looks sunken on day three.
- Inspect for ponding marks – a dark ring of silt at the low point of the driveway tells you where future ponding will happen and where the joints will fail first.
- Check the joints along low edges specifically for sunken sand. Full top-off in the low areas is often enough.
If water ponded against the garage threshold or foundation, that’s a different call – bring a professional in to look at the grade and drainage. Ponding against the house is a foundation concern, not a paver concern, and no amount of re-sanding will fix it. That’s the kind of thing that connects to our Home Additions & ADU in Newport Beach scope, where the grading plan actually gets tested before the addition goes in.
What You Can Do Yourself vs. What Needs a Pro
Most of this schedule is homeowner work. Snow plow damage doesn’t live here. Winter freeze damage doesn’t live here. What we have is dust, sand, UV, salt air, and a couple of hundred square feet of surface inspection. That’s owner-maintainable, and the DIY list is genuinely longer than most people think:
Safe for a confident homeowner:
- Spring and fall perimeter walks, rock testing, joint depth checks
- Weed pulling between pavers
- Blowing out grit after a Santa Ana wind event
- Top-off sand application (small areas, dry weather, correct product)
- Irrigation head redirect and drainage debris clearing
- Visual edge restraint check
Better done by a professional:
- Full polymeric sand replacement – the joint prep, dry-in, misting, and cure window are where installations fail when done wrong
- Sealer application – wrong surface temperature or residual moisture will make it look worse than doing nothing
- Any edge restraint repair along a curb or right-of-way
- Any rocking pavers beyond a single paver (bedding layer problem)
- Post-flooding drainage correction
- Anything where the underlying grade or drainage is at issue
If you’re a homeowner who wants the annual calendar handled rather than learning it, that’s a service. Our technicians have up to 12 years of experience with paver systems specific to Southern California coastal conditions, and every paver job carries the same 730-Day Done Right Promise – if it’s not right, we make it right. We also carry top-tier hardscape brands including Belgard, so when a section does need replacing, you can match what’s already on the driveway.
Common Mistakes to Avoid
- Power-washing at full pressure to clean the driveway. This strips polymeric sand far faster than any weather event. Use a leaf blower or a garden hose, or set the pressure washer to the lowest setting and never aim at the joints dead-on.
- Re-sealing on a damp morning. Newport Beach’s marine layer lingers past 10 a.m. in fall and past 11 a.m. in winter on coastal streets. A sealer applied to a damp paver surfaces cures cloudy and wears off in a year.
- Top-off with generic sand instead of polymeric sand. Playsand and masonry sand will wash out within a single rain season. Every top-off has to use the correct polymeric sand – the color-match matters too, and matching aged sand color is not the same as matching new sand color.
- Skipping the edge restraint inspection. If you only do one thing on this list every year, let it be this one. Restraint failures are cheap before they’re visible and expensive once they’re not.
- Weed spray in the joints. Glyphosate in the paver joints breaks down the polymeric sand and, on a driveway that shares a landscape edge, kills your neighbors’ planting. Pull, don’t spray.
- Ignoring a single rocking paver. One paver becomes three, then a row, then a repair. The one-paver fix in spring is a fraction of the cost of a spring-to-fall row repair.
- Assuming inland is harder on pavers than coastal in Newport Beach. It’s the reverse. The marine layer moisture cycling and salt air on the coast are harder on polymeric sand than the dry inland UV in Bonita Canyon and Newport Coast. Coastal driveways should always be on the shorter end of the interval.
See the difference
 Before
 After
 Before
 After
 Before
 After
When to Call a Professional
Call a professional the moment you see any of these: pavers rocking more than a single unit, a visible gap along the edge restraint that’s grown over 90 days, joints that are empty all the way down to the bedding layer, water ponding against the garage threshold or foundation, or a full re-sand and seal cycle that’s come up at the same time – those are faster and cleaner when done together.
For everything else, the calendar above is yours to run. The schedule is what makes the difference. Two and a half hours a year on the right tasks, done in the right months, is the whole system.
Groundwork Construction Co. of Newport Beach offers free estimates in Newport Beach with written, line-item pricing – the number you see is the number you pay, and every project carries the 730-Day Done Right Promise. We also offer 0% financing for 18 months and $1,000 off projects over $10,000, so a full driveway replacement or a resand-and-seal package is doable without disrupting your household budget. If you’re not sure what your particular driveway needs, we’ll tell you: resand only, top-off only, or a full replacement. No upselling a job that doesn’t need doing. Start with a look at our full service range on the Groundwork Construction Co. of Newport Beach home page.
Frequently Asked Questions
Concrete pavers on the coast – Balboa, Lido Isle, Corona del Mar, Balboa Peninsula – should be resealed every three years. Inland at Eastbluff, Bonita Canyon and Newport Coast, every four to five years is enough. Clay and brick pavers can stretch to five to seven years. Natural stone is shorter: travertine every two to three years on the coast, three to four inland.
If the joint sand is still firm when you poke it and only sits an eighth to a quarter inch below the paver chamfer, top it off. If you can see daylight down between the pavers, the joint surface is 3/8″ or more below the surface, or the sand crumbles when pressed – replace it. If pavers rock when you walk on them, that’s a full replacement job and a joint-stability concern, not a cosmetic one. Call (833) 749-3967 for an in-person assessment if you’re between the two.
Blow grit out of the joints on low pressure, walk the perimeter for displaced sand and mini-dunes at the edges, and clear any channel drain or scupper where a palm frond or leaf could collect. Do this within two weeks – sitting grit prevents a future top-off from bonding and forces a full resand a year or two earlier than necessary.
Not at full pressure. Power-washing at high PSI strips polymeric sand faster than any weather event. Use a leaf blower or garden hose in most cases. If you must pressure-wash, use the lowest pressure setting, keep the wand moving, and never aim perpendicular at the joints. Expect to re-sand the joints after any pressure wash.
Inspect the full perimeter of the driveway once a year, ideally in fall before the rain season. Walk slowly and look for any visible gap between the outer paver row and the concrete curb or aluminum edge restraint. Press firmly on the outer paver row with your heel – if it flexes outward, the restraint is losing grip. Note the location and check it again in 90 days. A gap that grows needs a professional repair. A gap that doesn’t grow is stable.
Under three hours a year, spread across four or five visits. Roughly 30 minutes in late winter for a perimeter walk, 60-90 minutes in spring for top-off and weed control, 30 minutes in summer for a restraint check, and 60-90 minutes in fall for a full re-sand or seal cycle if the intervals have come up. That’s the whole schedule – the reason most driveways outlive their lesser-maintained neighbors by fifteen to twenty years is that the calendar is actually followed, not that the work is hard.
The Bottom Line
A paver driveway that gets the right task at the right interval outlasts one that gets sporadic attention by fifteen to twenty years. The full system is simple: top off joints each spring, walk the edge restraints every fall, replace polymeric sand every four to six years on the coast and six to eight inland, seal concrete pavers every three years coastal and four to five years inland. Watch the outer paver row for the first sign of sand loss. Clear grit after every Santa Ana wind event. Redirect the irrigation if it’s hitting the driveway. That’s the whole schedule. Do that, and the driveway in front of your Newport Beach home stays flat, weed-free and firmly seated for the long horizon – the way the pavers were meant to last in the first place.
Call (833) 749-3967 to schedule your free estimate with Groundwork Construction Co. of Newport Beach. Calls are answered by a live person 24/7, our technicians are background-checked and arrive in uniform, and every project comes with the 730-Day Done Right Promise – built to last, backed in writing.
Written by the team at Groundwork Construction Co. of Newport Beach.